


Choosing an LED Resistor
Understanding the intricacies of LED circuits and the significance of selecting the right resistor is essential for both beginners and seasoned electronics enthusiasts alike. In this comprehensive guide, we will delve deep into the world of LEDs, exploring their fundamental properties, the role of resistors, and the application of Ohm's Law in determining resistor values. By the end of this discourse, you will not only grasp the principles governing LED operation but also gain practical insights into crafting efficient and durable LED setups.
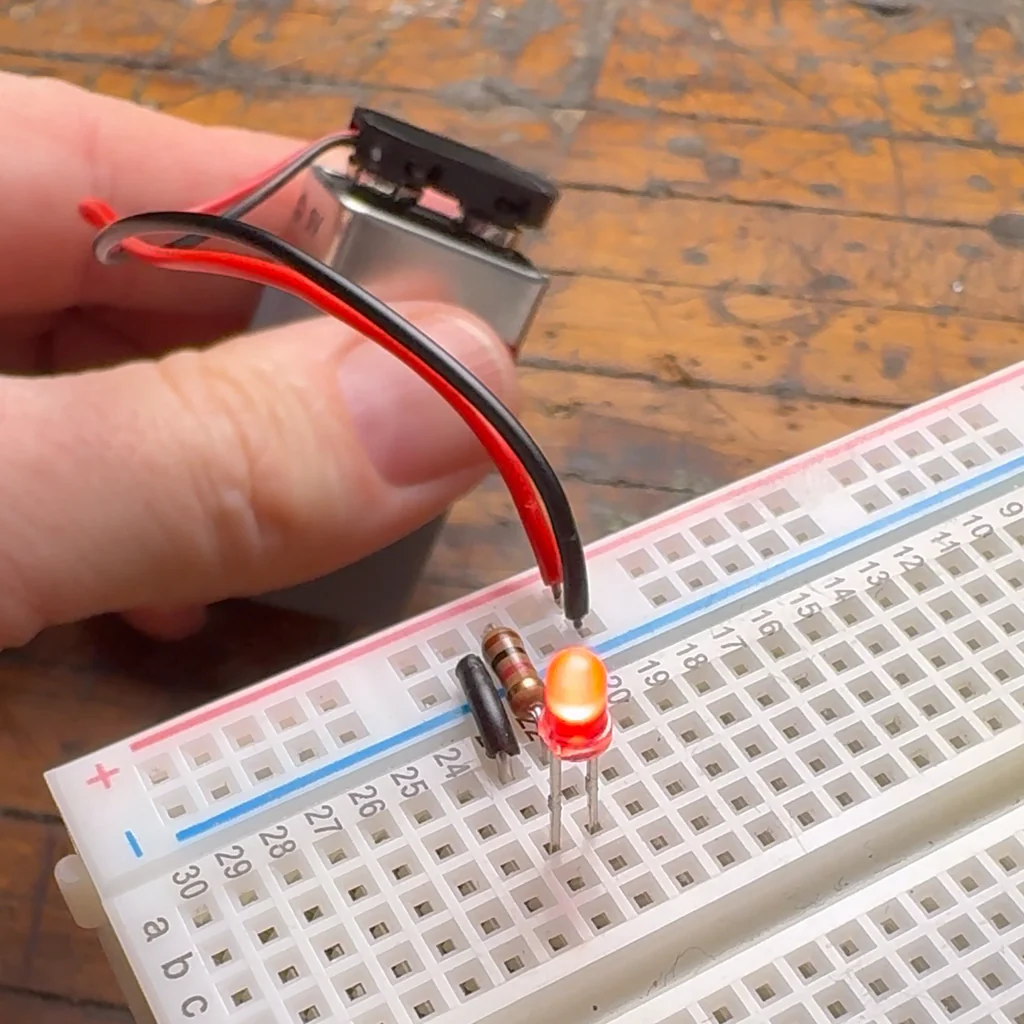
Led & Resistor
The Fundamentals of LEDs
Light-emitting diodes, or LEDs, have revolutionized the world of lighting and electronics. Unlike traditional incandescent bulbs, which rely on heating a filament to produce light, LEDs generate illumination through a process known as electroluminescence. This phenomenon occurs when electrons recombine with electron holes within the semiconductor material of the LED, releasing energy in the form of photons.
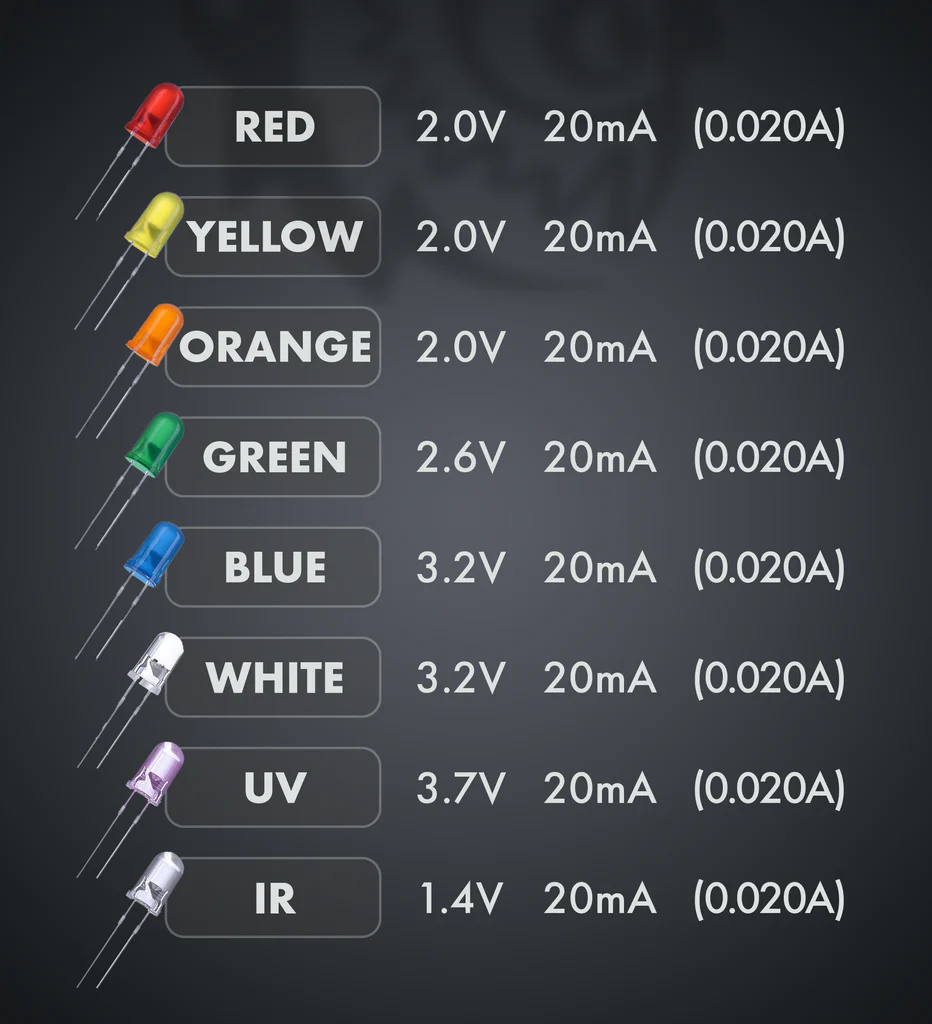
LEDs are characterized by two primary parameters: forward voltage and current. The forward voltage represents the voltage required to illuminate the LED and typically ranges from 2V to 3.2V, depending on factors such as color and size. Meanwhile, the current, often around 20mA (milliamperes), is the amount of electrical current needed to drive the LED efficiently without causing damage.
The Role of Resistors in LED Circuits
Resistors play a crucial role in LED circuits by limiting the flow of current and protecting the LED from excessive electrical stress. When an LED is connected directly to a voltage source, such as a battery or power supply, without a current-limiting resistor, it may draw excessive current, leading to overheating and potential damage.
By incorporating a resistor into the circuit, we can control the amount of current flowing through the LED, ensuring that it operates within its specified parameters. This not only prevents damage to the LED but also prolongs its lifespan and ensures optimal performance.
Applying Ohm's Law:
Applying Ohm's Law: A Practical Approach
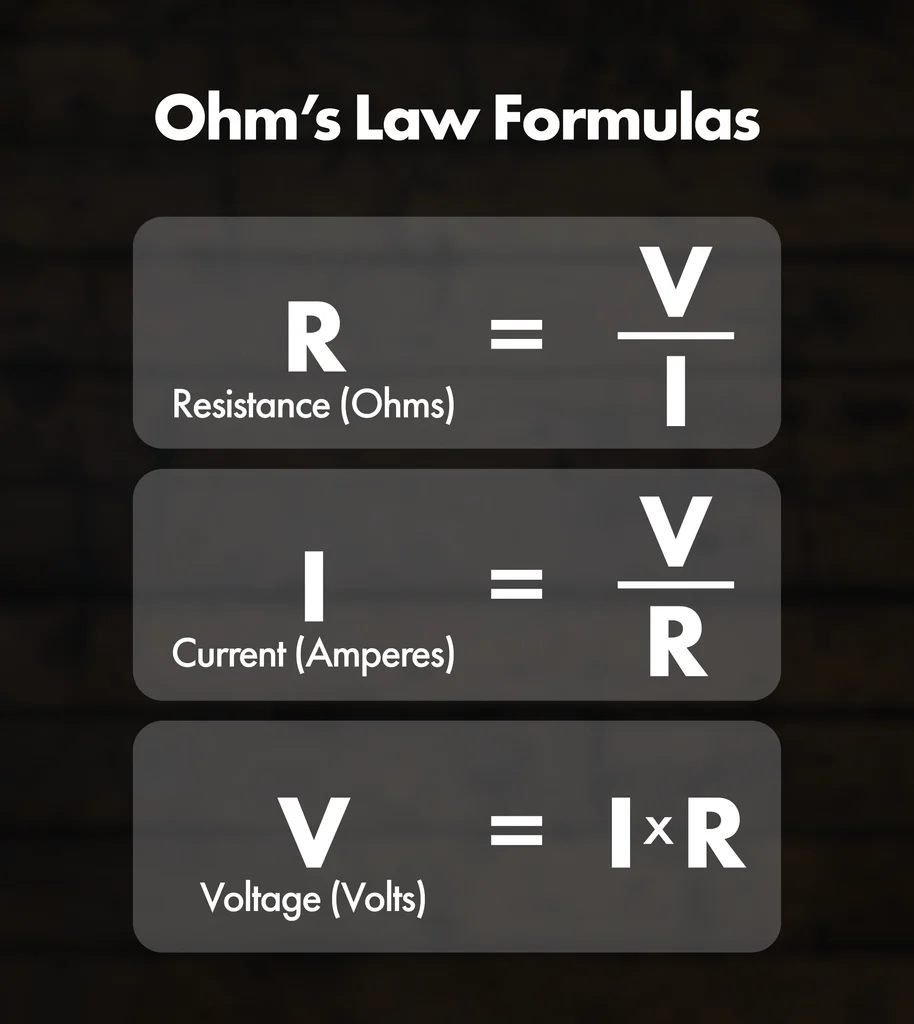
Ohm's Law, named after the German physicist Georg Simon Ohm, is a fundamental principle in electronics that relates the voltage (V), current (I), and resistance (R) in an electrical circuit. The law is expressed mathematically as:
Where:
- represents the voltage across the resistor,
- denotes the current flowing through the resistor, and
- is the resistance of the resistor.
In the context of LED circuits, Ohm's Law provides a straightforward method for calculating the resistor value necessary to achieve the desired current flow and voltage drop across the LED.
Calculating Resistor Values for LED Circuits
To determine the appropriate resistor value for an LED circuit, we follow a systematic approach:
Identify the Forward Voltage: Begin by determining the forward voltage of the LED, which is the voltage required to light up the LED. This value can typically be found in the LED's datasheet or specifications.
Determine the Power Source Voltage: Next, ascertain the voltage supplied by the power source, such as a battery or power supply, to the LED circuit.
Calculate the Voltage Drop: The voltage drop across the resistor is the difference between the power source voltage and the LED's forward voltage. This can be expressed as:
Select the Desired Current: Determine the desired current flowing through the LED. While LEDs can often handle brief current spikes, it's advisable to operate them within their recommended current rating to ensure longevity and stability. A common value for LED current is 20mA (0.02A).
Apply Ohm's Law: Once the voltage drop and desired current are known, we can use Ohm's Law to calculate the resistor value. Rearranging the formula , we obtain:
Where is the resistance in ohms (), is the voltage drop across the resistor, and is the desired current flowing through the circuit.
- Selecting the Resistor: With the resistor value calculated, choose a resistor with a resistance value closest to the calculated value. If the exact resistor value is not available, opt for the next higher standard resistor value to ensure adequate current limiting and LED protection.
Practical Example: Calculating Resistor Value for an LED Circuit
Let's illustrate the resistor calculation process with a practical example:
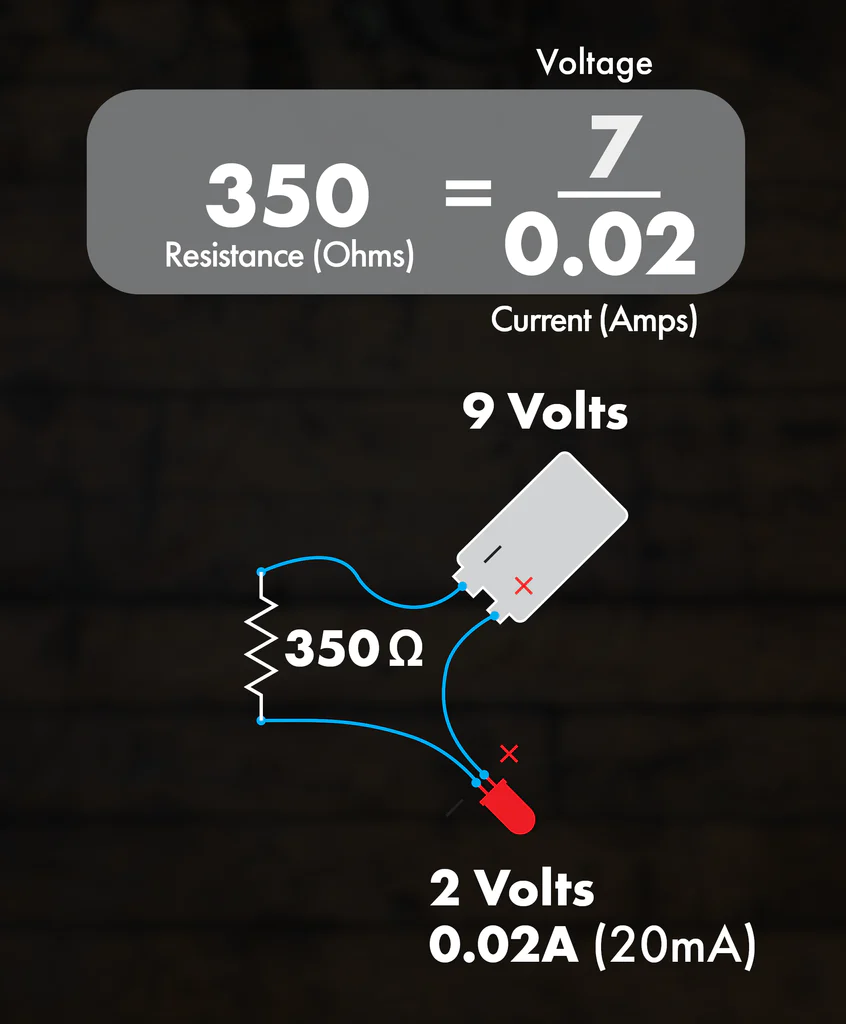
Suppose we have a red LED with a forward voltage () of 2V and a power source () of 9V. We want to limit the current () flowing through the LED to 20mA.
Calculate the Voltage Drop:
Apply Ohm's Law:
Select the Resistor:
Choose a resistor with a value close to 350 ohms. If a 350-ohm resistor is not available, opt for the next higher standard value, such as 390 ohms or 470 ohms, to ensure adequate current limiting.
Ohm's law states that the voltage across a conductor is directly
proportional to the current flowing through it.
The formula (R = V/I) is your best tool for calculating the necessary
resistor value. Start by determining the voltage drop across the resistor,
which is the difference between your power source (like a 9V battery) and the
LED's forward voltage. For instance, using a red LED with a 2V forward voltage
in a circuit with a 9V battery results in a 7V drop across the resistor.
Choosing the Resistor:
When determining the appropriate resistor for your LED circuit, you'll divide the voltage drop by the LED's current requirement. For instance, if there's a 7V drop across the resistor for a 20mA LED, the resistor value would be 350 ohms. If you don't have the exact resistor value available, it's safer to choose a higher one. For instance, you might opt for a 1K ohm resistor. This precaution ensures that the LED operates within safe limits, protecting it from excessive current and potential damage.
Selecting a higher resistor value provides a buffer against fluctuations in voltage and current, which can occur due to variations in power sources or environmental factors. Additionally, it offers a margin of safety, particularly if the LED experiences brief spikes in current. While it's essential to match the resistor as closely as possible to the calculated value for optimal performance, erring on the side of caution with a higher resistance value is a prudent choice. Moreover, using a higher resistor value can extend the lifespan of the LED by minimizing stress on its components. By limiting the current flowing through the LED, the resistor helps maintain a stable operating condition, reducing the risk of overheating and premature failure. Therefore, when in doubt, it's advisable to prioritize safety and longevity by opting for a slightly higher resistor value for your LED circuits. Once you know the voltage drop, divide it by the LED's current requirement to find the resistor value. Continuing our example, a 7V drop for a 20mA LED gives a resistor value of 350 ohms. If you don't have the exact value, opt for a higher one to ensure safety, like a 1K ohm resistor.
Conclusion: Crafting Efficient and Durable LED Setups
In conclusion, selecting the appropriate resistor for LED circuits is crucial for ensuring their efficiency, longevity, and safety. By understanding the fundamental principles of LED operation, the role of resistors, and the application of Ohm's Law, you can confidently design LED setups that meet your specific requirements.
Remember to always refer to the datasheets and specifications of your LEDs to ensure proper operating conditions. Additionally, consider factors such as ambient temperature, power dissipation, and voltage tolerances when designing LED circuits for optimal performance.
With the knowledge gained from this guide, you're well-equipped to embark on your journey of creating efficient and durable LED setups. Whether you're a hobbyist tinkering with electronics or a professional designer working on innovative projects, mastering the art of resistor selection will undoubtedly enhance your LED experiences and open up a world of possibilities in lighting and electronics applications
Picking the right resistor for your LED isn’t just about making it light up; it’s about precision and longevity. Now you are well on your way to creating efficient and durable LED circuits.

Comment