0
In this tutorial we will learn everything we need to know about controlling stepper motors with Arduino. We will cover how to control a NEMA17 stepper motor in combination with a A4988, a DRV8825 and a TMC2208 stepper driver.Table of ContentsWhat is a Stepper Motor and How It Works?How To Control NEMA17 Stepper Motor with Arduino and A4988 Stepper ..
0
243
The 74HC595 is an integrated circuit featuring an 8-bit shift register and a storage register with tri-state parallel outputs. It converts serial input into parallel output, allowing you to conserve MCU I/O pins.When MR (pin 10) is set to high level and OE (pin 13) is set to low level, data is clocked into the shift register on the rising edge of S..
0
196
Overview: Home Automation using ESP8266 Web ServerIn this project, we learn how to make IoT Based Home Automation using ESP8266 Web Server. By Home Automation we mean controlling lighting and appliances without any manual switch but using a system that is connected to the Internet. When connected to the Internet, home devices are an important const..
0
738
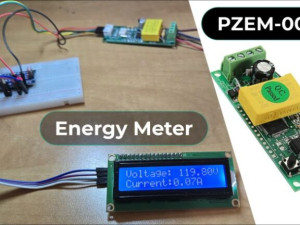
OverviewIn this project, we will interface PZEM-004T (a compact AC power monitoring module) with Arduino to build a single phase AC Energy Meter. PZEM-004T Current and Voltage reader is a module that can measure current, voltage, active power (W), energy (kWh), frequency, and power factor. The module uses Modbus-RTU, a standard protocol for industr..
0
218
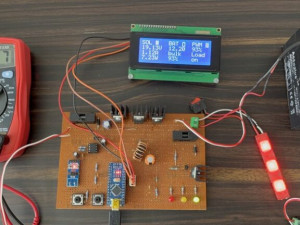
Arduino Source Code/ProgramWe can use Arduino IDE to write the MPPT Solar Charge Controller Project Code. The code has all the parameters and functions to measure Solar Panel Voltage, Current, Power, Battery Voltage, Charger state, SOC, PWM duty cycle, load status. The 20×4 LCD Display will show the real-time status of this parameters.The code requ..
0
282
OverviewIn this project we are going to build our own MPPT Solar Charge Controller using Arduino and by combining many active-passive electronics. MPPT means Maximum Power Point Tracking Controller. Most solar panels produce much higher voltage than is necessary to charge a 12V battery. A 12V charging panel will actually produce 16 to 18 volts, dep..
0
202
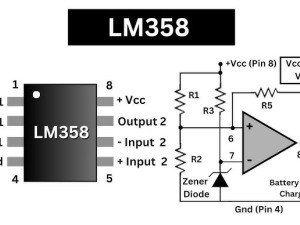
Introduction to Dual Op Amp IC LM358The LM358 is a highly versatile and widely used dual operational amplifier (op-amp) integrated circuit (IC) that has become a cornerstone in electronics due to its reliability, affordability, and flexibility. This IC integrates two independent, high-gain, frequency-compensated operational amplifiers within a sing..
0
380
The gravity arduino turbidity sensor detects water quality by measuring the levels of turbidity, or the opaqueness. It uses light to detect suspended particles in water by measuring the light transmittance and scattering rate, which changes with the amount of total suspended solids (TSS) in water. As the TTS increases, the liquid turbidity level in..
0
338
Since its introduction in 1982, the I2C (Inter-Integrated Circuit) protocol has been one of the most widely used communication standards in embedded systems and IoT (Internet of Things) devices. With its simple two-wire architecture, low cost, and high compatibility, I2C has become the preferred method for communication between microcontrollers, se..
0
650
In the world of electronics and DIY projects, two well-renowned platforms have become famous choices among hobbyists and professionals: Arduino and Raspberry Pi. Both Arduino and Raspberry Pi provide extraordinary features and abilities, but choosing the right platform for your project requires comprehending their strengths, restrictions, and the ..
0
355
Today we are going to discuss the invisible thing that makes computers, including the Raspberry Pi, work. And ultimately, setting up the Pi for actual use.Table Of ContentsOperating SystemsRaspberry Pi OSThe Kernel and FirmwareRaspberry Pi ImagerSetting Up the PiOperating SystemsThe operating system (also called OS) is an abstraction layer that mak..
0
477
This tutorial is all about the Raspberry Pi – a pocket-sized computer that can teach you several computer science technologies, including writing in several programming languages, building an operating system, and even creating your own gaming console!Table Of ContentsRaspberry PiComputers vs. MicrocontrollerChoosing a Raspberry PiSide-by-Side Comp..
0
416
In this project, I’ll guide you through creating a Wireless Keypad Data Transmitter with LCD Feedback system. The goal is to build a simple yet functional wireless communication setup. Using an NRF24L01 module, a keypad, and an LCD screen. You’ll learn how to send data wirelessly from the keypad and have it displayed on the LCD in real-time. It dem..
0
641
Another popular feature of the Raspberry Pi is its ability to interact with a wide range of electronic components, and the easiest way to do this is by using Python. In this tutorial, you will learn how to use the general-purpose input/output pins (GPIO) of Raspberry Pi using Python. 3Things you need:Raspberry PiLEDResistorsBreadboardJumper wiresTa..
0
468
The “ESP8266 Fan Controller and LCD Display” designed to control a fan using a microcontroller. A tactile button is used to turn the fan on and off. While an LCD display shows the current status of the fan. This setup makes it simple for anyone to use, offering a modern solution for fan control.This project focuses on simplicity and usability. The ..
0
3986
Whether you want to monitor your home from afar or activate the sprinkler system in your garden with a missed call; then the SIM800L GSM/GPRS module can serve as a solid launching point!The SIM800L GSM/GPRS module is a miniature GSM modem that can be used in a variety of IoT projects. You can use this module to do almost anything a normal cell phon..
0
669
Getting Started
with LCD 1602: A Beginner’s Guide The LCD 1602 is one of
the most commonly used display modules in electronics projects. Thanks to its
simplicity and versatility. It allows you to display data such as text,
numbers, or status messages. Making it ideal for projects like temperature
monitors, digital clocks, or e..
0
717
How to Control the Raspberry Pi GPIO using C A low-level language
like C is more efficient in programming microcontrollers because it is closer
to machine language. In this tutorial, you will learn how to use the
general-purpose input/output pins (GPIO) of Raspberry Pi using C.Thin..
0
1231
This is a troubleshooting guide for the most common issues with the DHT sensor when using ESP32, ESP8266, Arduino, or similar boards.If you get an error message in your serial Monitor while reading the temperature and humidity from the DHT11, DHT22, AM2302 or AM2301 sensor, follow the next steps to see if you can make it work.“Failed to read from D..
0
1581
This tutorial shows how to use the DHT11 and DHT22 temperature and humidity sensors with the ESP32 using Arduino IDE. We’ll go through a quick introduction to these sensors, pinout, wiring diagram, and finally the Arduino sketch.Learn how to display temperature and humidity readings on a web server using the ESP32 or ESP8266 boards:ESP32 DHT11/DHT2..

















![[SOLVED] DHT11/DHT22 – Failed to read from DHT sensor [SOLVED] DHT11/DHT22 – Failed to read from DHT sensor](https://store.nerokas.co.ke/image/cache/catalog/Andmore/Nerokas-Arduino-IDE-failed-to-read-from-dht-sensor-300x225h.webp)

