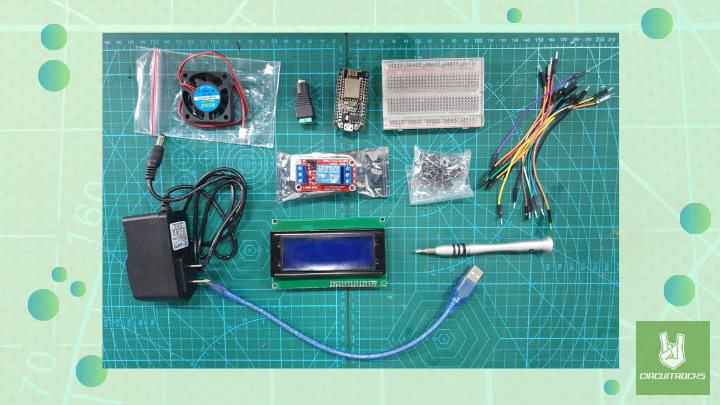
The “ESP8266 Fan Controller and LCD Display” designed to control a fan using a microcontroller. A tactile button is used to turn the fan on and off. While an LCD display shows the current status of the fan. This setup makes it simple for anyone to use, offering a modern solution for fan control.
This project focuses on simplicity and usability. The tactile button offers straightforward control, and the LCD display provides clear feedback, so users always know the fan’s status. This combination of components ensures that the fan is both easy to operate and informative.
Additionally, the ESP8266’s built-in WiFi capabilities allow for future upgrades. Such as remote control via a smartphone app or integration with a smart home system. This project not only teaches the basics of microcontroller programming and electronics. It also opens the door to more advanced IoT applications.
One terminal of the button to D1 (GPIO 5) on the ESP8266.
The other terminal of the button to GND.
LCD Connection:
SDA Pin: Connect to D2 (GPIO4) on the ESP8266.
SCL Pin: Connect to D3 (GPIO0) on the ESP8266.
VCC Pin: Connect to 3.3V on the ESP8266.
GND Pin: Connect to GND on the ESP8266.
Relay Module:
IN Pin: Connect to D8 (GPIO15) on the ESP8266.
DC+: Connect to the positive rail (12V) of the breadboard using a 12V power adapter.
DC-: Connect to the negative rail (12V) of the breadboard using a 12V power adapter.
NO (Normally Open): Connect to the positive wire of the 12V fan.
COM (Common): Connect to the positive rail of the breadboard.
Fan:
Positive Wire: Connect to the NO terminal on the relay.
Negative Wire: Connect to the negative rail of the breadboard.
Code:
A fan using a push button, with real-time feedback provided on an LCD screen. It combines basic components and libraries to demonstrate the principles of digital input handling, relay control, and I2C communication with an LCD.
#include<Wire.h>#include<LiquidCrystal_I2C.h>#include<ezButton.h>#define BUTTON_PIN D1 // The ESP8266 pin connected to the button's pin#define RELAY_PIN D8 // The ESP8266 pin connected to the relay's pin#define LCD_SDA_PIN D2 // The ESP8266 pin connected to the LCD SDA#define LCD_SCL_PIN D3 // The ESP8266 pin connected to the LCD SCL
ezButton button(BUTTON_PIN);// create ezButton object for pin D1bool fanOn =false;// Boolean to keep track of fan state// Set the LCD address to 0x27 for a 20 chars and 4 line displayLiquidCrystal_I2C lcd(0x27,20,4);void setup(){Serial.begin(9600);// Initialize the Serial to communicate with the Serial Monitor.
pinMode(RELAY_PIN, OUTPUT);// Set ESP8266 pin to output mode
button.setDebounceTime(50);// Set debounce time to 50 milliseconds
digitalWrite(RELAY_PIN, HIGH);// Initially turn off the fan (relay normally closed)// Initialize the I2C bus with the specified pinsWire.begin(LCD_SDA_PIN, LCD_SCL_PIN);// Initialize the LCD
lcd.begin(20,4);// Provide the number of columns and rows
lcd.backlight();// Turn on the backlight
lcd.setCursor(0,0);
lcd.print("Fan Status: OFF");// Initially display fan status as OFF}void loop(){
button.loop();// MUST call the loop() function firstif(button.isPressed()){
fanOn =!fanOn;// Toggle the fan stateif(fanOn){Serial.println("The fan is ON");
digitalWrite(RELAY_PIN, HIGH);// Turn on the fan
lcd.setCursor(0,0);
lcd.print("Fan Status: ON ");// Clear the previous text and update the LCD display}else{Serial.println("The fan is OFF");
digitalWrite(RELAY_PIN, LOW);// Turn off the fan
lcd.setCursor(0,0);
lcd.print("Fan Status: OFF");// Clear the previous text and update the LCD display}}}
Troubleshooting:
General Debugging Steps
Ground Connections: Verify that all components share a common ground connection to avoid grounding issues.
Power Issues: Ensure the ESP8266 and other components are receiving appropriate and stable power supply.
Component Integrity: Ensure all components (ESP8266, relay, LCD, button) are functioning correctly and not damaged.
Contrast Setting: Adjust the contrast potentiometer on the LCD module if the display is dim or not visible.


Comment